
I’ve been making major updates and changes to my materials in the intro physics course this year. It is the first year we are teaching a yearlong physics class to everyone (10th graders) in my school as the result of a big curriculum redesign in science, and the first time back to teaching a course like this in a few years for me. I will try to update this blog with each of the new activities and changes as I have time. First up: the kinematics stacks of curves.
What are you talking about with these Stacks of Kinematics Curves?
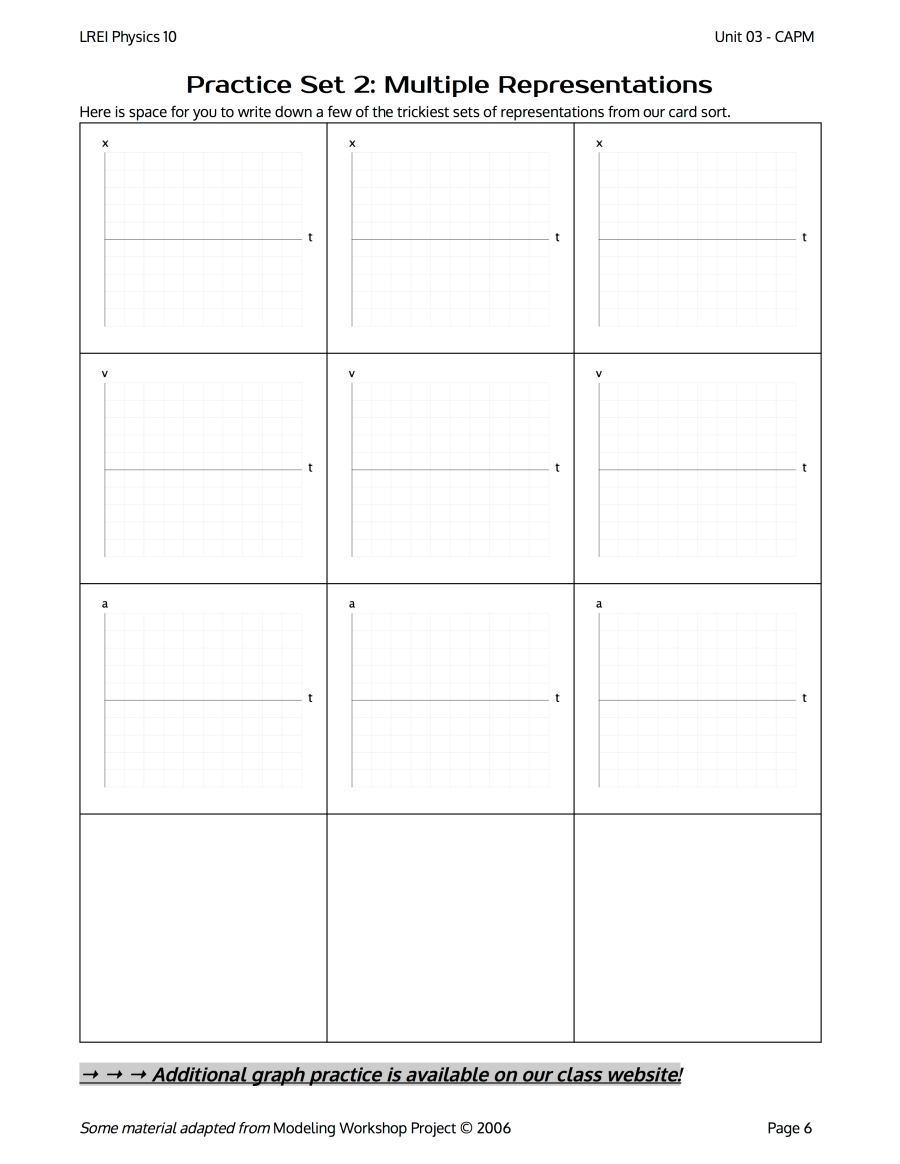
The Modeling Instruction canon materials have a worksheet that asks students to translate kinematics graphs into other representations. I updated it a bit with new graphs and to add in some questions about forces since I’ve moved Balanced Forces ahead of Constant Acceleration. It’s two pages long and has students translate 16 different sets of graphs (8 starting with x-t graphs and 8 starting with v-t graphs). Here’s a screenshot sample of my old page that I hope will me into the minimum amount of trouble.

It’s a great activity with great discussion. It takes a while to get through, and it’s pretty challenging. Completing the page only helps a few students while the discussion helps many, many more students.
So in my redesign of the Physics 10 course, I wondered about how to streamline the activity and activate the most value for the most students as early as possible.
Making the Card Sort
I decided to make the stacks of curves activity into a card sort so that students could immediately jump into the discussion instead of having to generate the graphs themselves first.
Here are the pages that I used to make the cards. The blank cards are intentional (see below). I made the graphs using GraphSketcher.


And here are those pages as a Google Doc that you can copy to your own drive and then edit yourself.
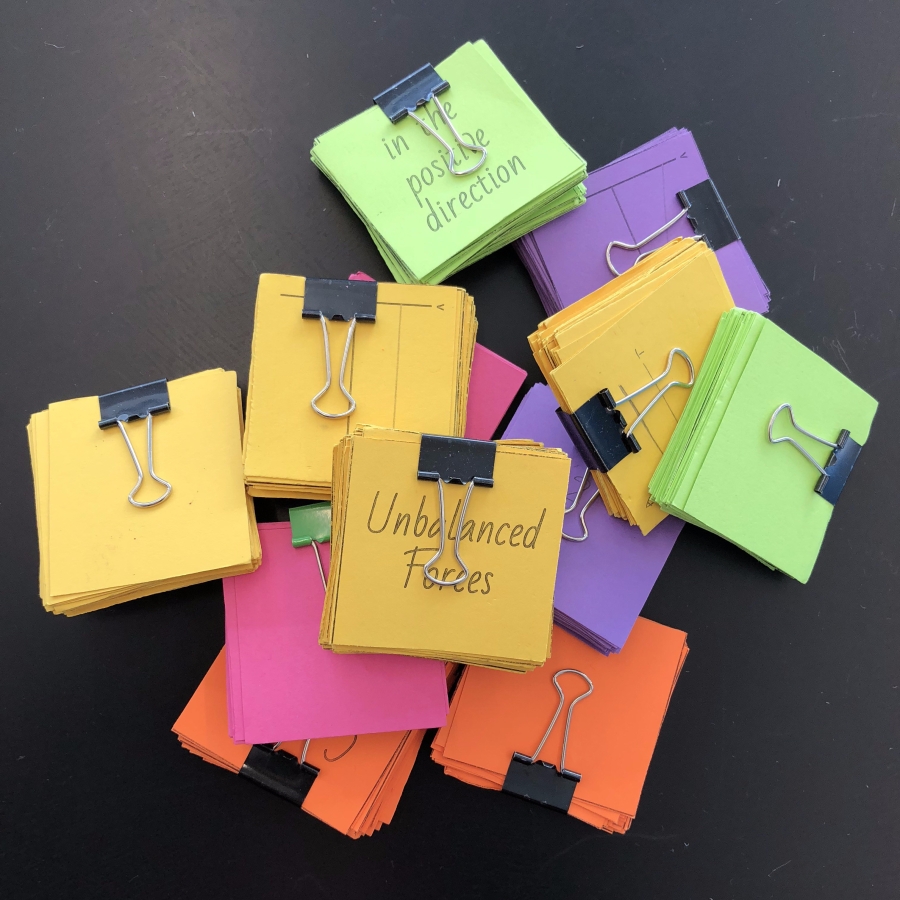
I copied these pages onto card stock paper so they would hold up through at least a few days of use. (If I had easy access to a laminator, I would have laminated the cards that aren’t blank for easier re-use in the future.) I copied a set for each group, cut them out, and clipped one group’s cards together with a small binder clip.
Graph Design Choices
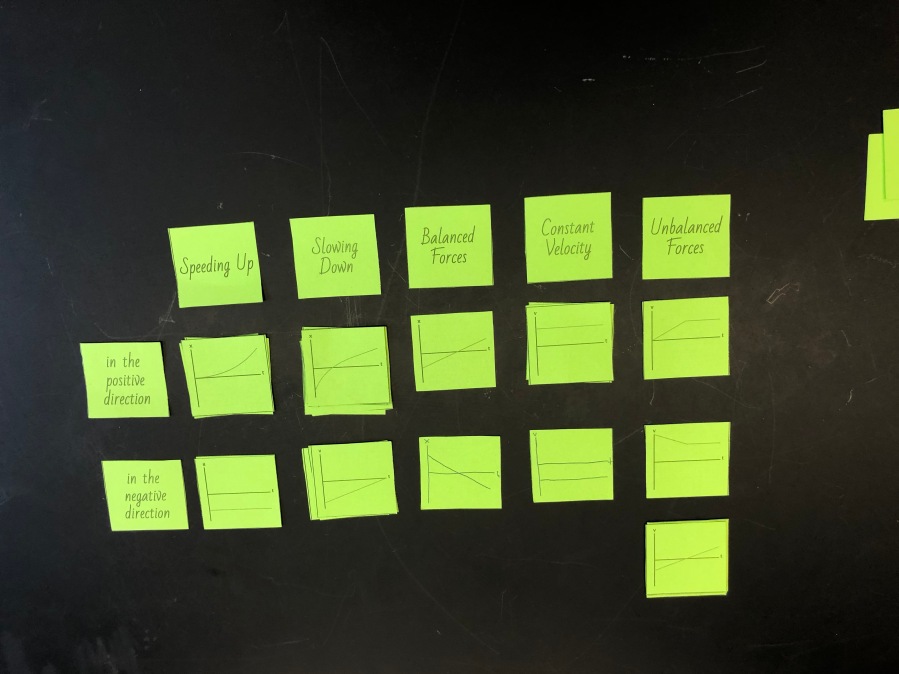
I only included 2 acceleration-time graphs. I hoped to prompt conversations about the meaning of the acceleration and especially the sign of the acceleration, and that did happen in most (maybe all—I couldn’t hear all of the conversations at once) groups.
There are multiple x-t graphs showing the same motion, so groups would realize that this wasn’t a pairing activity after a while. It also helped bring up the idea of not being able to tell the starting position from a v-t graph, objects not being at 0 m at 0 s, and positive/negative direction versus positive/negative position.
Some of the graphs showed multi-part motion, adding in some of the complexity of the original activity.
Some of the v-t and x-t graphs don’t have any matches with other graphs. That helped make the “solution” to the card sort more ambiguous and prompted some use of the blank cards.
Having 6 blank cards is a lot, and I wanted to keep the options open for how they would be used. That worked really well. Some groups never used any. Some groups used them for making extra acceleration-time graphs. Some made extra copies of the words to make the grouping fit their concept. Some made the “missing” x-t and v-t graphs for the cards that didn’t have matches. All of them were great solutions, and having so many blank cards made it feel low stakes to try something when they had an idea./
The original activity didn’t ask students to do a written description of the motion, so adding in the word cards helped connect students to even more representations. Having balanced and unbalanced forces as descriptions helped make connections with acceleration during later discussions and connected the work we are doing now to everything else we have done so far this year.
The 3 pages seemed to have the right total number of cards. The amount of cards seemed like a lot (to the students) when they first examined them, but it was manageable, fit on their tables, and took a reasonable amount of time.
Implementation
The instructions for the activity were simply, “Here are some cards. Arrange them in a way that makes the most sense.”
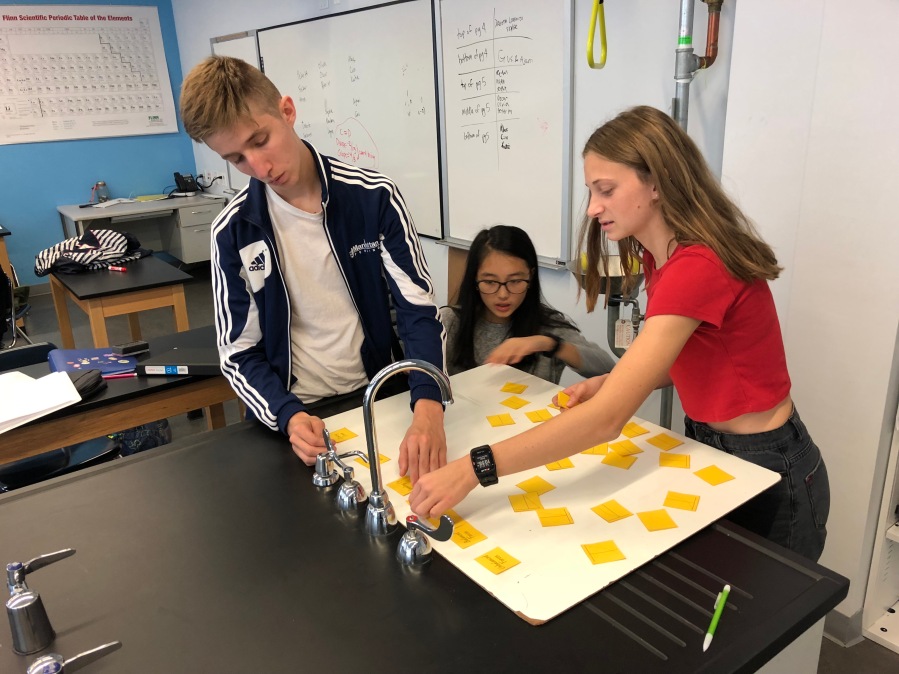
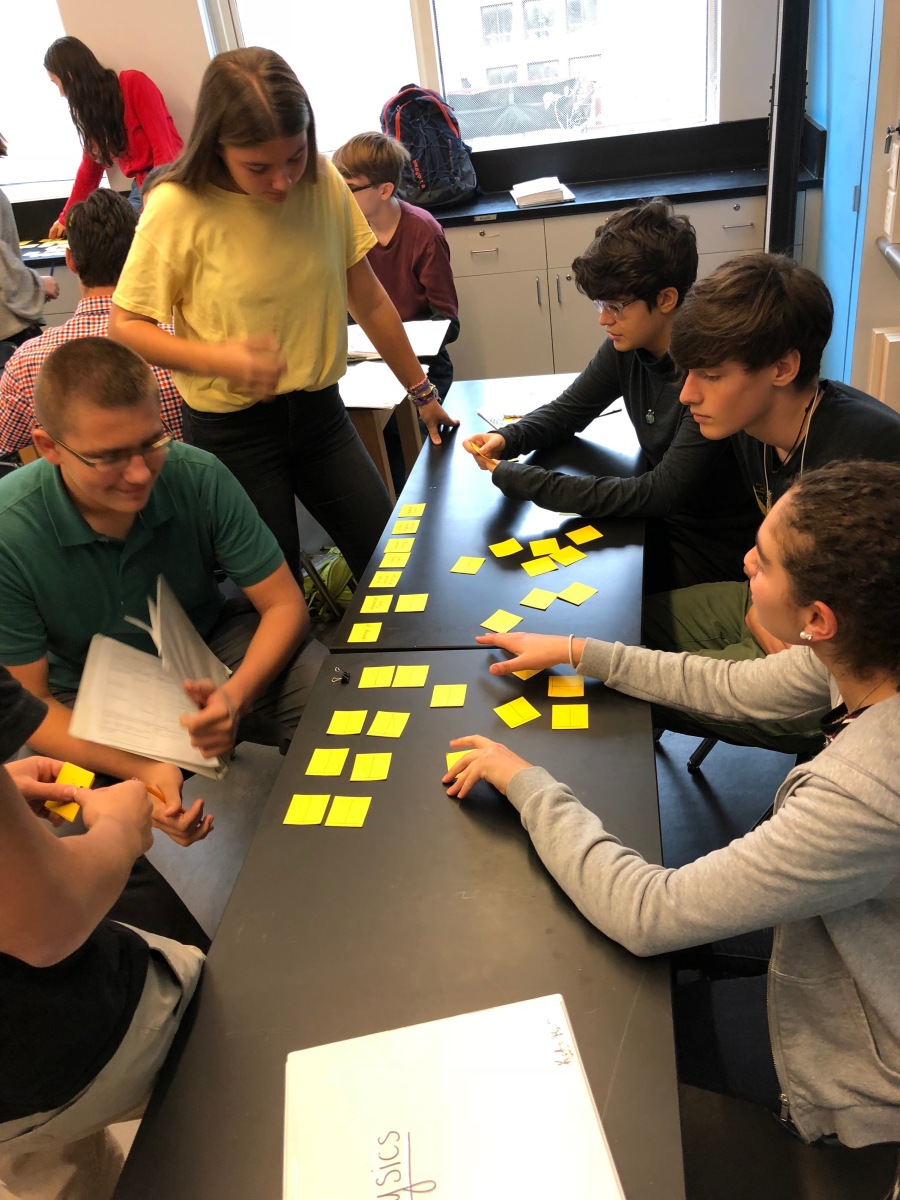
Students opened the binder clips and start spreading the cards out on the table. In my first class, every group saw the word cards as “categories” that the other cards should be sorted into. They lined up the words and started putting graphs with them that they thought would match.
They quickly realized that many graphs fit more than one category. They started making hierarchies of categories. They put balanced forces and constant velocity together very quickly, and they put unbalanced forces as a large category over everything else. Eventually, most groups started noticing that multiple graphs showed the same motion and grouped those more closely, too. If they didn’t move toward a more connected arrangement, I would ask a question or two and nudge them into thinking about that.
As they worked, I mentioned that I had just come up with this activity and didn’t have any one right answer in mind. I took photos of their work and let them know it was to share with other teachers who might want to try this activity in their classes, too. They loved that, and told other students in the class “We are hamsters for other physics classes!” (We have wonderfully strange students here. I’m in the right place.)
And are these not two amazing class photos? I mean, really.


More photos of students card sorting:


I let them work for about 35-40 minutes (but it was split over two days because of the timing of other activities in class). Then I paired groups together and had them visit each other’s tables and share/discuss their arrangements. Some students took a photo of their final arrangements.
In one class, a question about the usefulness of the acceleration-time graph emerged from their discussions. What is the point of drawing this graph if it basically tells us nothing—not the direction of motion, not whether an object is speeding up versus slowing down? I gave them a tiny preview by asking what it told them if the acceleration was zero. [It means the velocity is constant. So the forces are balanced.] I asked what it meant if the acceleration wasn’t zero. [So the forces are unbalanced. Oh.]
We had a quiz scheduled, so we tied things together more the next day.
Holding Back the Word Cards
I have 2 sections of this class, so I tried a small variation in the second section. I removed all of the word cards before giving them the set. About halfway through their work, I dropped the word cards on their table, saying, “Oh look, I forgot to give you a few cards.” Not having word cards made a huge difference in their first conversations. They sorted the cards in a different way, finding categories based on the graphs instead of using the words as their organizing structure. It went well both ways, but I think I liked the conversations that they had better in the second version.
Follow Up
The next day, I put 6 velocity-time graphs up on the board and had groups sign up for different ones. They made boards that had all 4 representations (x-t, v-t, a-t, and written) matching their graph, then presented (with mistakes) and discussed. The idea of the acceleration being the slope of the velocity-time graph came up over and over and over again, with more voices chiming in to help with that idea as they went.
This page was printed in their packet so they could record 3 of the 6 that were presented and have a record of some of the work that they did.
Some of the additional graph practice on our class website is the two pages of that old activity, and I know some students have followed up by working on it already. I know others will be working on it soon after that first quiz.
It’s tough to know a lot about how well this activity worked compared to what I’ve done in the past (for a lot of reasons). It definitely took less time, and much more of the time was spent in conversations involving more students. On the quiz (an early quiz for CAPM graphs and older BFPM concepts), it seemed that students were better than usual at describing the motion in words given a graph and about the same as usual at drawing the graphs to match one they were given. Actually, I think they were a little better at that than usual, too.
—
OF COURSE, please feel free to use this card sort, modify it in anyway, etc. (Please just don’t take credit for creating it if/when sharing with other teachers.) If you do use it, please let me know how it goes and pass along any improvements you make as you modify it for your own classes. What I’ve shared here is very much a Version 1.0.


Kelly, this is awesome! Another thing I would love to try if I were still teaching!
Sorry you won’t be at AAPTWM18. I may or may not be at the summer meeting.
Fran, what?!
Kelly, this is a superb activity. I love so many parts of it.
After doing a very similar exercise with mine I added categories for them to sort the graphs into and match to (beyond just speed and direction) – like Sorting them by Newton’s Laws or matching them to free body diagrams. I also handed out large pt and vt graphs to the students and they had to find their match and then each pt/vt pair had to justify the match. This unearthed a lot of good conversation and pulled those who were lagging into a better understanding. At the beginning of the unit I gave each group a pt graph (no prior lecture) and said they needed to all understand it well enough so that when I called on one of them they could act it out. Even though the title included ”straight line motion” I placed some books on the floor for the hill that I knew a lot of them would believe was represented on the graph (they see y vs x not x vs t). After the first group that used the books to go up and down acted theirs out, I did a demo (without talking much about what I was doing) and asked them if this made any changes to their thinking and gave all remaining groups time to revise their thinking. What I did was lay a long piece of colored butcher paper on the ground and above it moved a titration pipette full of water back and forth (perpendicular to the paper) a couple of times while the paper wasn’t moving. Then I said, “wait a minute – we need to represent time some how” and now as I moved forward and backward dropping water, I had a student slowly pull the paper at a constant speed. I asked them to observe that my actual motion was fw and bw along a straight line and to also notice differences between when I did this fast or slow. As the ‘hills’ emerged on the paper the room began to buzz with understanding. An extra plus – no mess and the paper was dry by the next period. So much fun to be their Windex!
Lorri, great idea to combine free body/force diagrams. I think combining these will make a great activity when we review for the fall final 🙂
For those looking for a few options for free body diagrams being added to the sort, I’ve added a few more cards to this file.
https://docs.google.com/document/d/1dO2QZTuhDTHTtE9d0YorF7ncm_yB70qQXieblHWIVEA/edit?usp=sharing
I saw this post in the middle of unit 4 (BFPM, and we do CAPM first) and thought this activity can slightly change the focus from kinematic graphs to force diagrams with the addition of a few links (like Lorri mentioned). I have way too many cards and will probably eliminate some of the repeated x vs t graphs, but I’ll play around with it. Also – a great differentiated activity depending on what cards you provide. Thanks Kelly!
[…] CAPM Card Sort I want to revisit CAPM this week, so we started with Kelly O’Shea’s card sort. A lot of groups needed some nudging to differentiate between constant velocity and constant […]
This is awesome. I used it as part of my review for the midterm exam. Having already covered Forces and Energy, it was great to see some discussion of these topics as well.
This is great! Although we are following the “traditional” Modeling sequence this year, we’ll probably shift to introducing forces after CVPM next year. The card sort will be produced and used tomorrow in my classes. Great stuff!
[…] my first card sort activity, I was eager to design more. Quick heads up—this card sort is VERY different from the kinematics […]
[…] sorts of activities, especially ones that promote more group work and discourse within groups. (See kinematics card sort, momentum card […]
[…] actually first made a card sort because I saw Kelly using one in her class. Check out her post too! There will also be more card sorts posted as a result of her […]
[…] over the break), students will still be rusty. With this in mind, and some inspiration from Kelly O’shea’s Card Sort activity, and the Goal-less problems that I am fond of , I created my own “Matching […]
This was amazing!! Lots of great conversations during class and even had some students show up after school so they could “play with the cards some more.” Thank you.
[…] Source: Stacks of Kinematics Curves as a Card Sort […]
[…] worked on Kelly O’Shea’s CAPM card sort. First, they did the most basic sort they could using just the graphs. Next, they did a sort using […]
[…] style of this activity is somewhere between my kinematics graphs card sort and my momentum representations card sort. It has right answers, but it also requires more than […]
[…] created an abundance of these sorts and they are amazing to work with. I particularly like the way Kelly O’Shea runs her kinematics exercise with students. First students are given just the graphs and asked to organize the cards in any […]
[…] analysis to get position vs. time and velocity vs. time graphs for a cart on a ramp, then worked on Kelly O’Shea’s CAPM card sort. This was my first time using video analysis to introduce constant acceleration, and I’m […]